If you've ever honored me with a visit to my own personal
blog, then you know that I am obsessed with two things: 1) finding ways to express ethnic heritage visually and 2) using my Cricut Expression! I'm so obsessed with my Cricut, that I became a Cricut Circle Member. This has allowed me to see the work of some very talented members through various challenges.
Today's tutorial was quite eye catching when I saw it in the weekly challenge about flowers. I thought it was a great tutorial to share for anyone celebrating Easter, but this could easily turn into a fun gift for Mother's Day, for a special little girl in your life, for a flower girl at a wedding...oh there are sooo many possibilities for this adorable project!
I'll stop raving and let Nadia's work speak for itself! You can see more of her creations at her blog,
With Glitter Eyes. Paper Flowers!
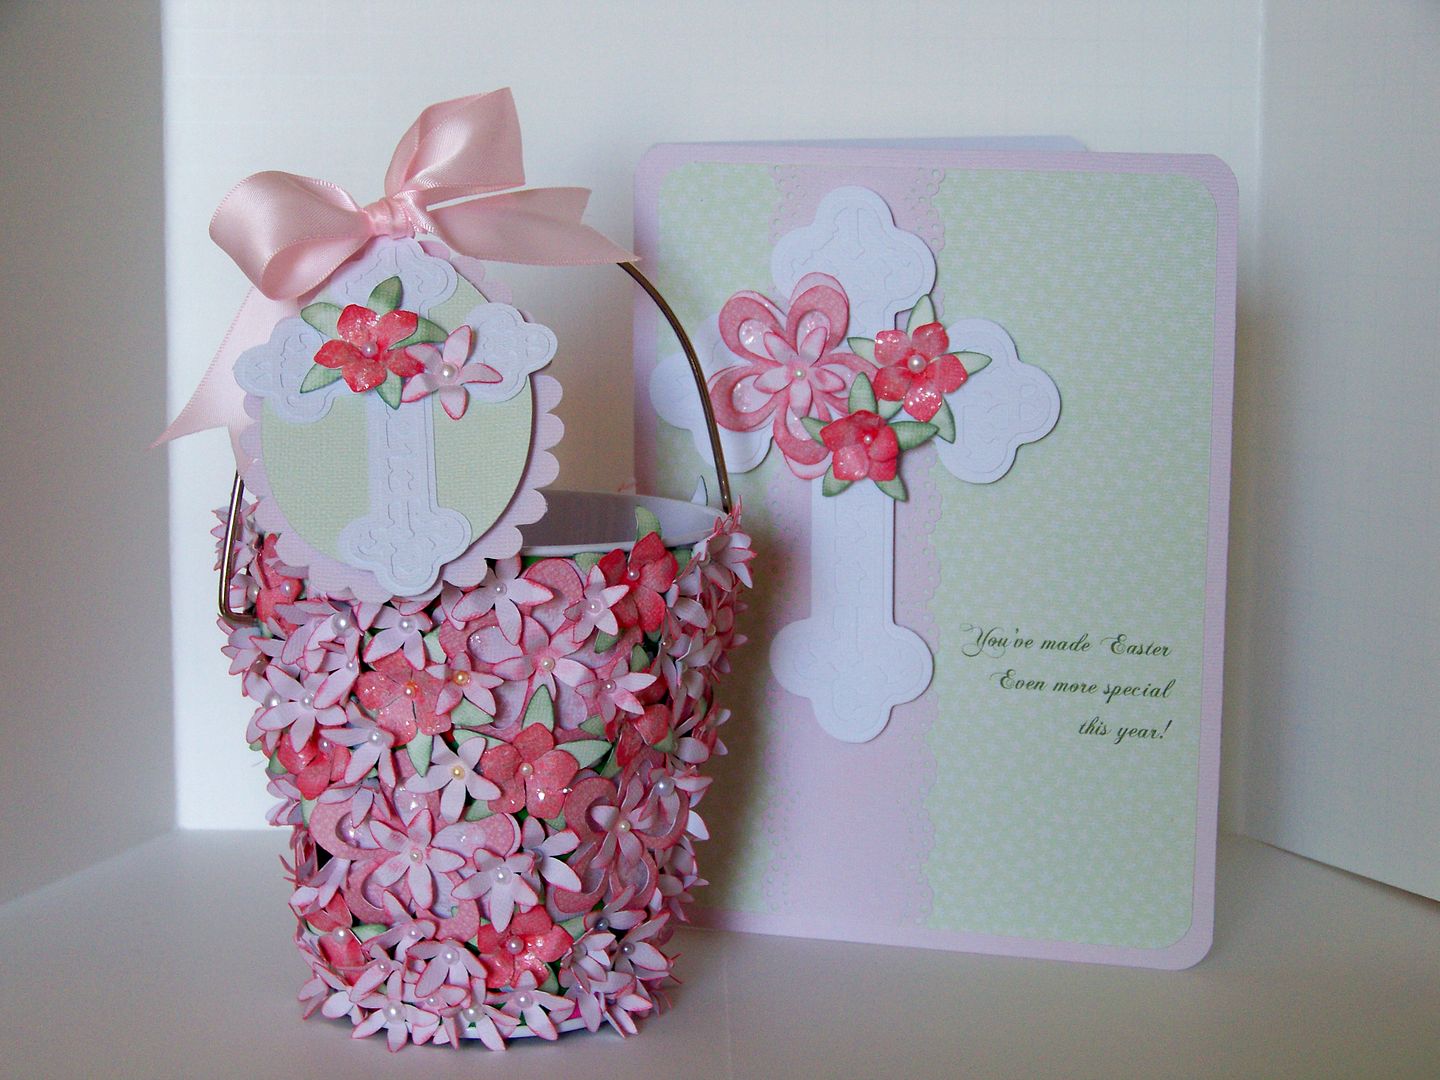
This weekend, I worked on three challenge projects that go together. I wanted to make a special gift for a friend who has helped me this past year.
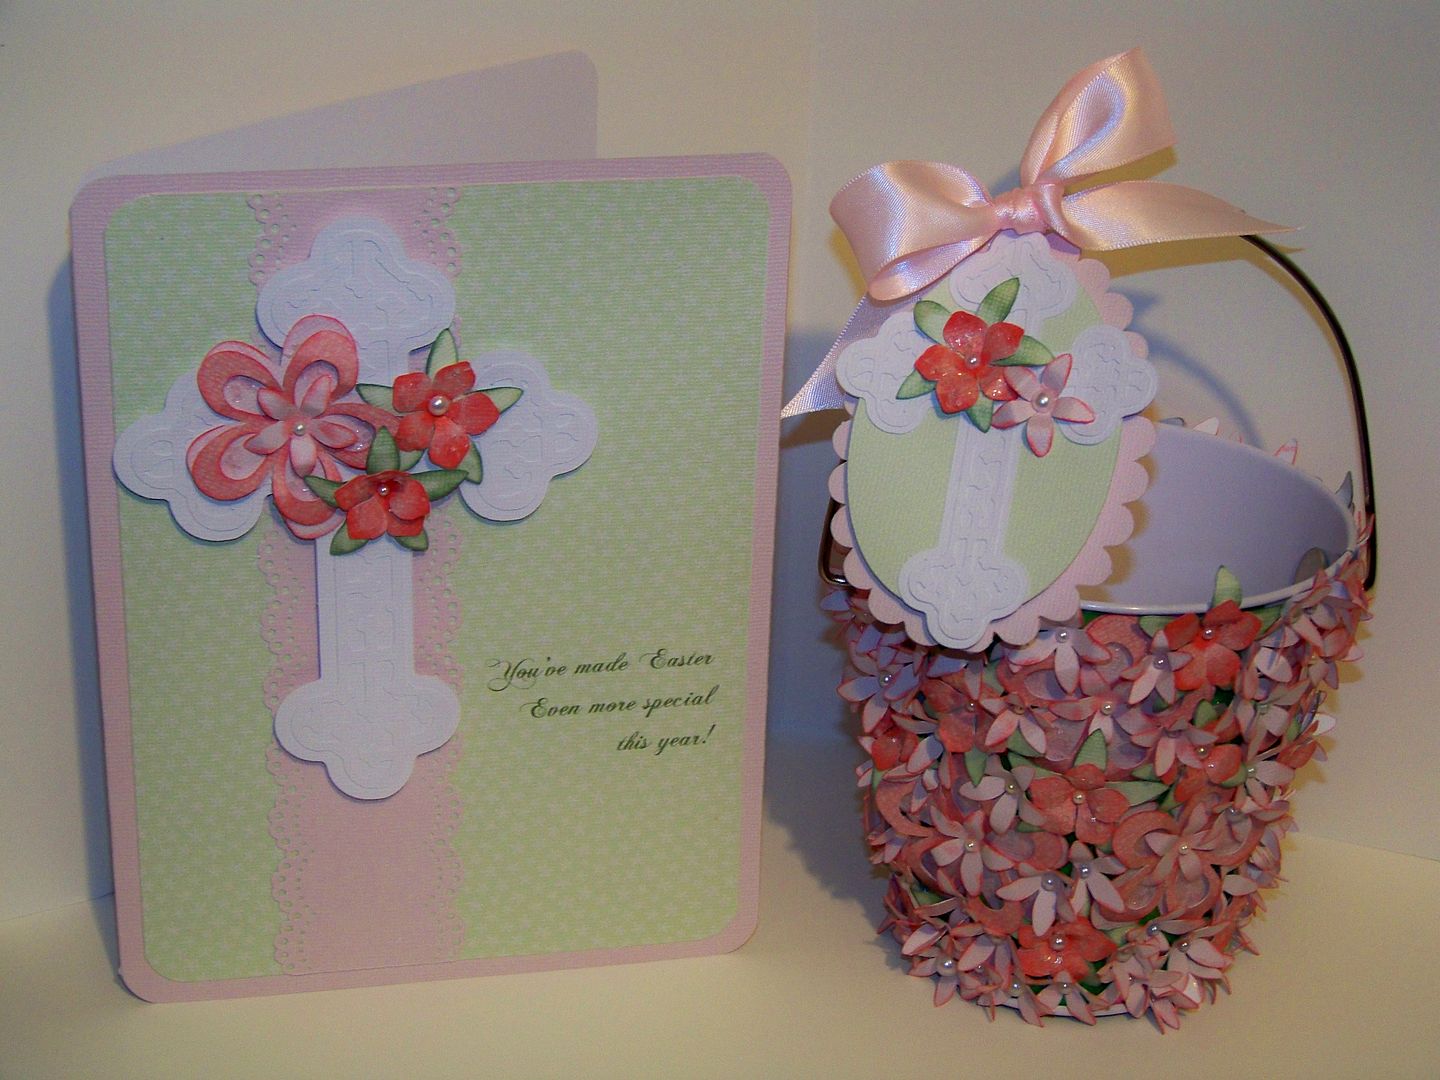 |
| The card, tag, and basket are challenge projects I have created to match! |
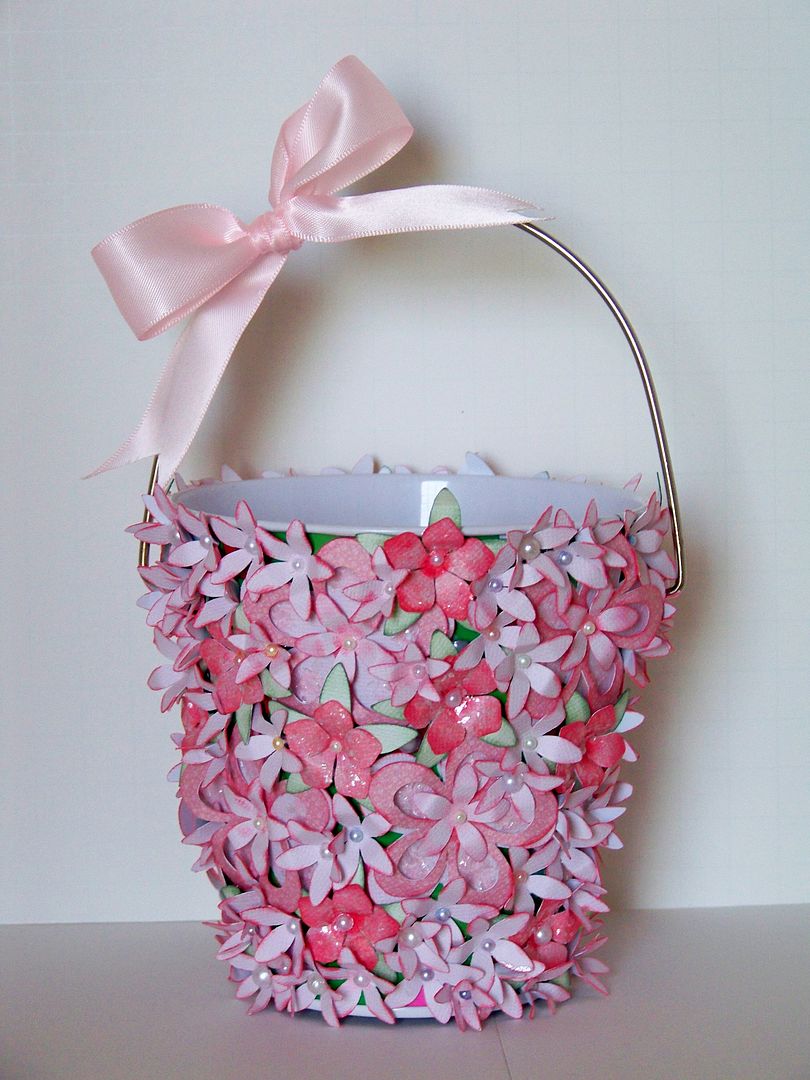
The Circle Blog's Weekly Challenge #29: Handmade Flower Challenge piqued my interest because I love making dimensional flowers. I have played a bit with Mother's Day Bouquet and decided that it would be fun to cover an object with flowers. I have some leftover metal buckets from Christmas that I purchased for $1 at Target.
I cut TONS of flowers using that cart and flood filling them with colors from Nursery Tails. After I made a few test cuts, I decided on several that I liked best.
 |
| I was so glad I had this chart once I decided to make additional flowers for a card and tag! |
 |
| I inked, glittered, and added pearls to accent them. |
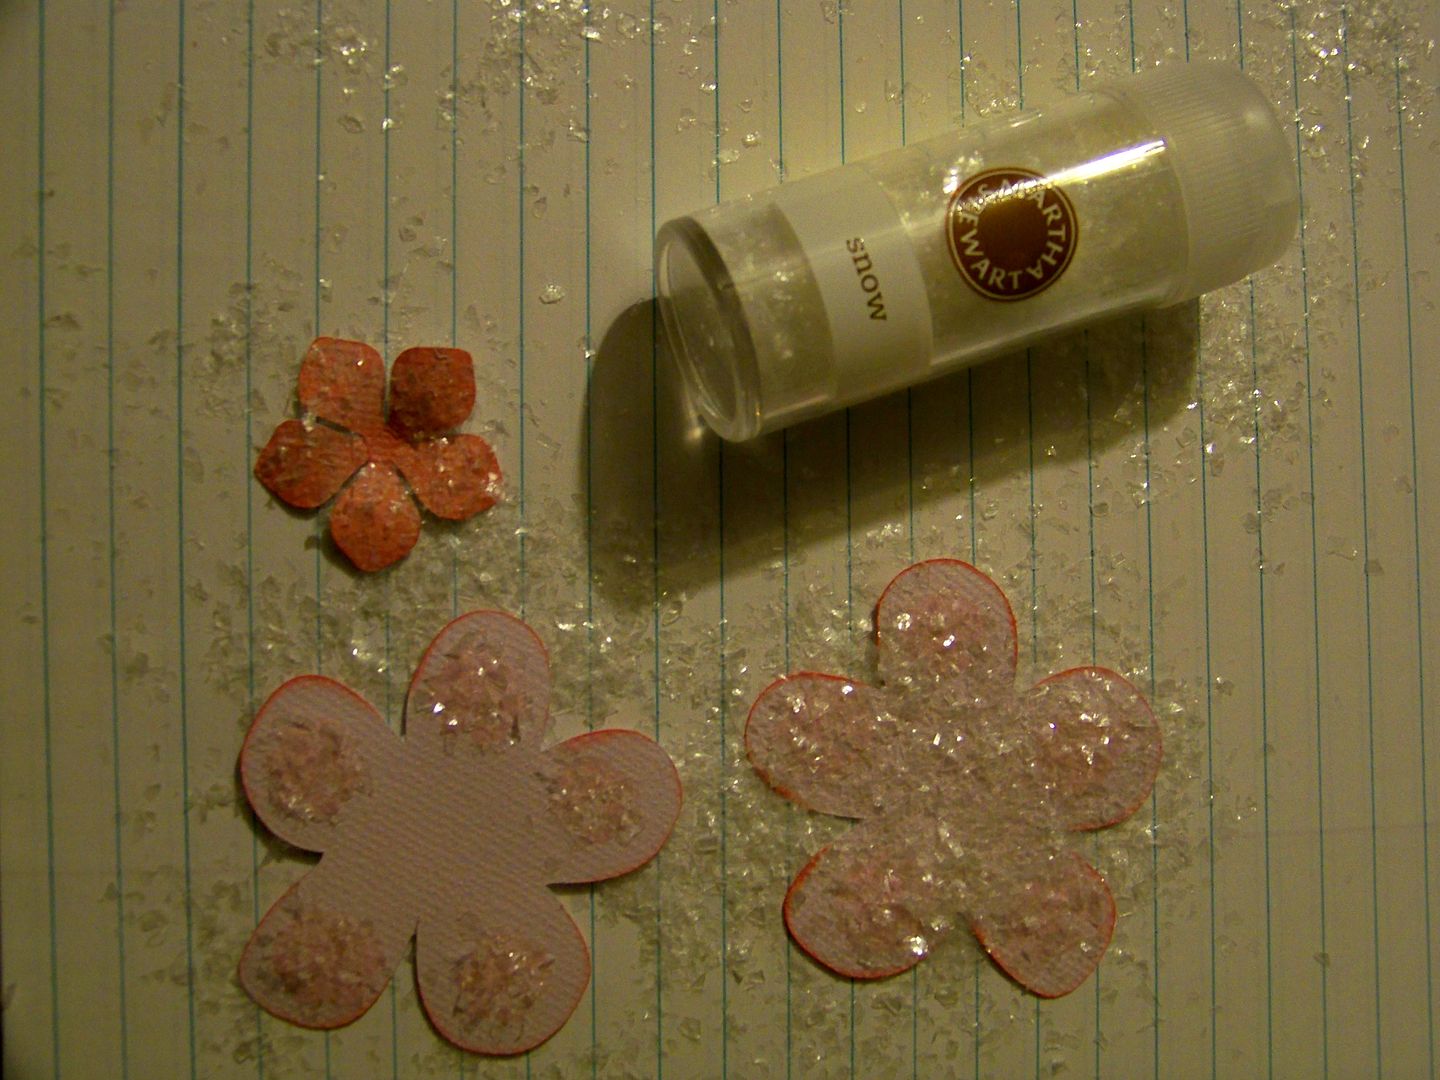 |
| I used a chunkier glitter than I normally use and really liked the results. |
I used E6000 plastic adhesive to ensure that the flowers would not pop off of the metal can. I started crowding the flowers together and went back to fill any with additional small flowers at the end, covering the bucket completely and hiding the polka dots. The gluing process took quite longer than I expected because I had allow time for the glue to dry before being able to roll the bucket to a new section. Patience definitely pays off on a project like this!
I really liked the way it finished! When I read Allison's Weekend Challenge on the MB and saw her fantastic card sketch, I knew I wanted a matching card!
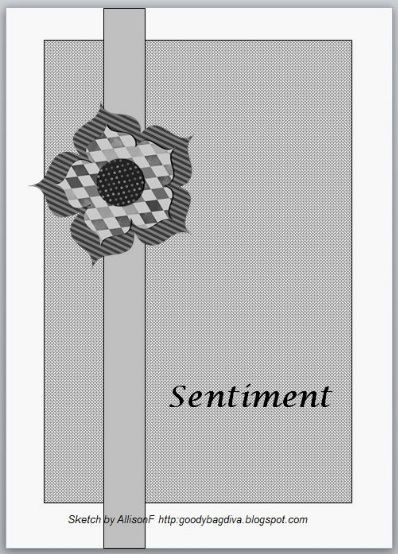 |
| Allison created this sketch!!! I have to learn to do that. |
I started with the cross on Easter 2010. I cut it at 2.9" with the shadow. I used matching flowers to decorate the cross.
I printed pink and green cardstock using the same colors from Nursery Tails that I had floodfilled on my flowers to use for the card base and mat. The base was cut at 12" wide by 8" tall and then scored to finish folded at 6" x 8". The mat was cut at 5.5" by 7.5". I used my Zutter 1/2" Corner Chomper to round the edges of the base and mat. I used a Martha Stewart edge punch to decorate a paper ribbon, applying with double-sided tape. I printed the sentiment on my computer using Microsoft's Chopin Script at 20 point, using the darkest green under 'theme colors'. The cross was popped up with foam dots.

Doxie's Sunday Challenge gave me a little incentive to continue on my theme to create a tag for my basket and submit an entry for her Shape Challenge: Ovals. Using the scalloped and smooth egg shapes on Easter 2010, I cut them at 1.8. The colors were also from Nursery Tails. I cut another cross from the same cart, just like the one I cut for the card, but this one was 2". More flowers and pop dots to add depth to the tag and I ended with this.
 |
| I think the basket is really enhanced by the tag. It really adds to it. I love it when things work out that way! |
I was so pleased with this set. I will be filling the bucket with cake bonbons to present to my friend after the Easter Vigil next weekend.
Today is Palm Sunday. As we lead up to Holy Week, I wanted to be free for the extra services and events and am thankful to the challenge ladies for prompting me to do this project now!


5 comments:
Beautiful post Nubia!!! I do visit your personal blog through my reader. I've left a couple of comments but usually don't have the time but just know I see you wonderful Cricut projects!!!
Beautiful job...Thanks for letting us know...
Another wonderful work of art. I love Nadias' creativity. Thank you Jodie for letting us know.
HUGE HUGE fan of Nadia's! I am so excited to see her featured on your blog, she is amazing!
Lori
Thank you for your kind words ladies. So flattered to asked to be a part of this and so happy to learn about this organization!
Nadia (With Glittering Eyes blog)
Post a Comment